| Scroll ignore |
|---|
| Scroll ignore |
Possible causes and solution(s)
Causes
On DIP-6180-00N or DIP-61F0-00N (DIVAR IP 6000 & 7000 R2 - units without HDD from Factory), when the user boots the system from DVD, runs “Initial Factory Setup” or “System Recovery” task, “successfully complete” message shows up in a short time, but the OS is not installed correctly onto the server.
These two functions from the DVD assume the server is loaded with RAID-setup hard drive(s) in the front panel, which is by design. If RAID has not been setup and not hard drive(s) installed to the front panel, these two functions will not perform properly and no OS is loaded to the server.
If you want to reinstall your unit with unconfigured HDDs and the RAID is not created yet, follow the steps below:
Solution
A) From MegaRAID BIOS Configuration Utility:
Step 1: Insert at least one hard drive in the front panel. Reboot the system to DVD.
Step 2: press “Ctrl” + “R” to enter RAID setting (MegaRAID Configuration Utility) when you see the message:

Step 3: setup one RAID level as needed, either RAID 0, 1, or 5.
1. Go to “VD Mgmt” tab, move curser to “AVAGO 3108 MegaRAID (Bus 0x02, Dev 0x00)

2. Press “F2” to recall operations

3. Select “Create Virtual Drive”, then press “Enter”
4. Select “RAID Level” and all the hard drives

5. Move curser to “OK” and press “Enter”

6. Click “OK” to confirm.

Step 4: press “Esc” to exit RAID setting, reboot the server to DVD.
After RAID is created it would be recommended to do an Initial Factory Setup → delete all your data (this option will also automatically create the virtual drives necessary for video recording environment)
B) From Windows MegaRAID Utility
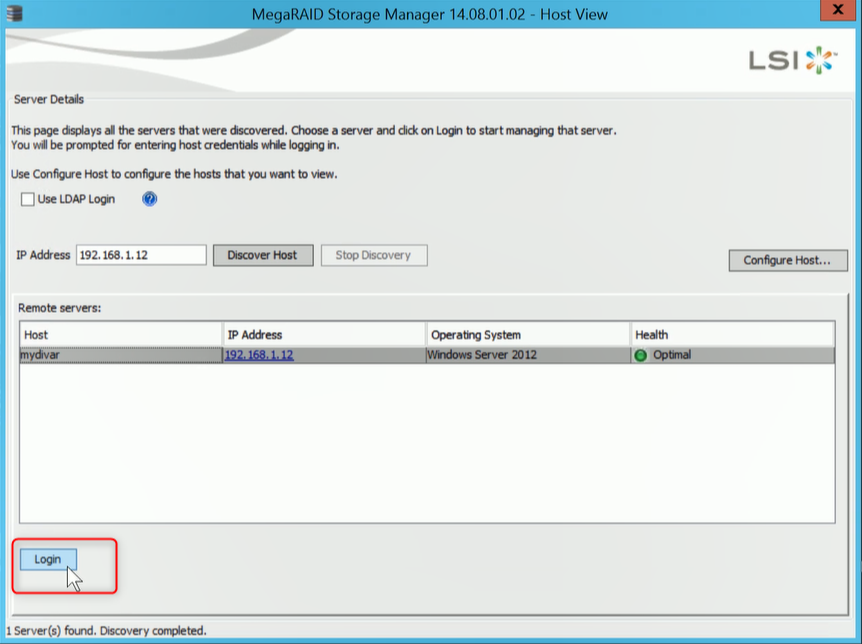
1. Open MegaRAID Storage Manager
2. Select your device and hit Login button
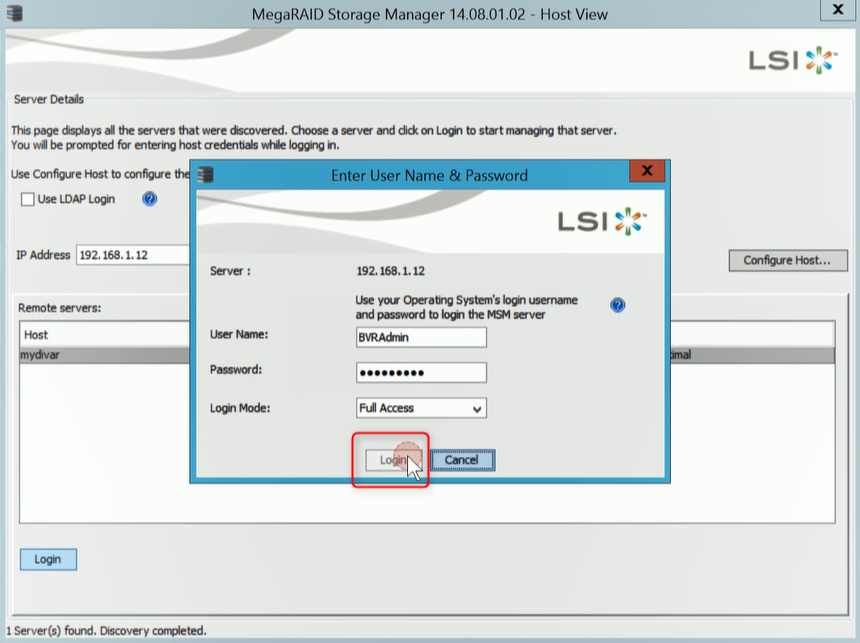
3. Fill in the credentials of the unit and hit Login button.
4. In Dashboard tab from MegaRAID Storage Manager, you will see that the capacity of DIVAR IP is not configured yet.
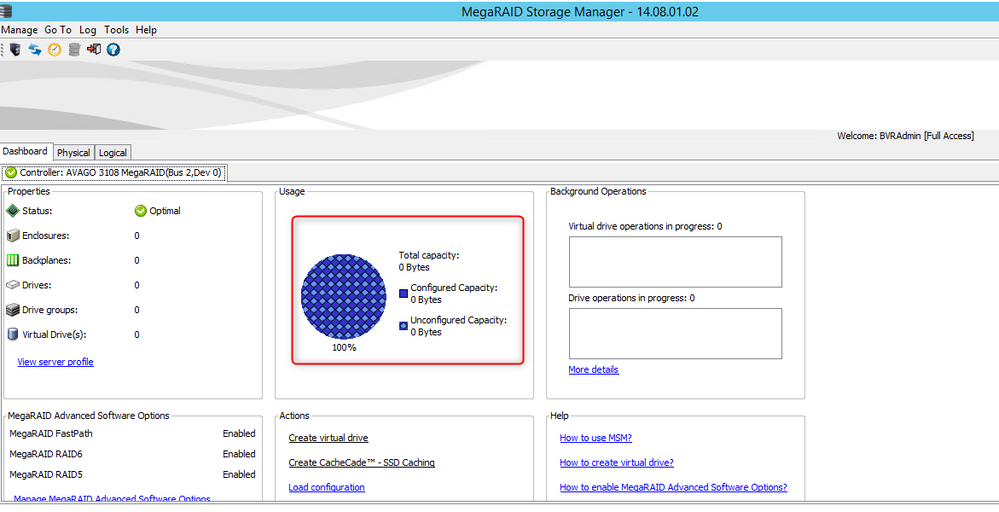
- Next, from the MegaRAID application, the new controller card and all of the unit's physical drives should be visible. No Virtual Disk will be present.

- Right click the controller card icon and select "Create Virtual Drive".

- This will open the "Create Virtual Drive" wizard.
Select "Advanced" and select "Next".

From the "Create Drive Group" menu, make the following adjustments:
- Set the RAID Level to RAID 5
- Select all available drives in the "unconfigured drives" menu and select the "Add >>>" tab

Once all available drives have been added, select the "Create Drive Group" tab:

The "Virtual Drive Settings" need to be adjusted to the appliance's performance specifications.
The following adjustments should be made:
- Fast Initialization
- Strip Size: 64KB
- Read Policy: Ahead
- Write Policy: Always Write Back
- I/O Policy: Direct
- Disk Cache Policy: Disable
- After the settings have been confirmed, select "Create Virtual Disk"

After selecting "create", you will receive a write policy warning. Select yes and continue. The wizard will then display a summary screen; close the menu.
After RAID is created it would be recommended to do an Initial Factory Setup → delete all your data (this option will also automatically create the virtual drives necessary for video recording environment)